How to Fix Your Posture in 1 Week: 12 Exercises That Actually Work (According to the physiotherapists)
Right now, as you’re reading this, your shoulders are probably hunched forward, your neck is tilted down, and your back is curved like a question mark. You’re not alone. Research shows that 65% of desk workers develop musculoskeletal pain, with 40-80% of office workers experiencing disorders from poor posture.
If you’re spending hours at a desk, you’re likely part of this statistic. The good news? Studies demonstrate significant pain reduction and posture improvement within just 4 weeks of consistent training, with noticeable changes possible in the first week.
The 7-Day Posture Transformation
What Happens to Your Body
Your muscles recognize correct alignment and begin adapting to new positions
Core strengthens, tension reduces in neck and shoulders
Posture improves naturally without constant reminders
Less pain, more confidence, better breathing
That’s all it takes to transform your posture and reduce pain
Slouched shoulders, forward head, chronic pain and fatigue
Aligned spine, confident stance, reduced pain and more energy
In this guide, you’ll discover 12 proven posture correction exercises that target the root causes of poor posture, a simple daily routine requiring just 15-20 minutes, and science-backed techniques that deliver visible results in one week.
Understanding Why Your Posture Needs Fixing
Your back hurts after work. Your neck feels stiff. Your shoulders slouch forward when you sit. Sound familiar?

Here’s something that might surprise you: poor posture can cut your productivity by up to 66%. Think about that. Two-thirds of your work potential disappears because of how you sit or stand. Yet fewer than half of Americans worry about what bad posture does to their bodies.
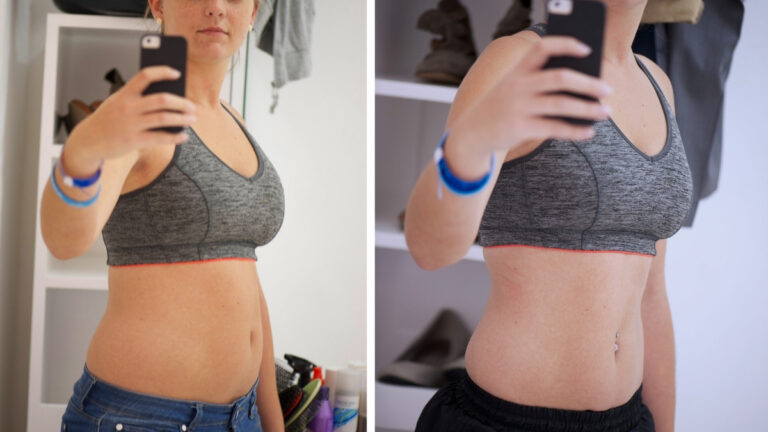
Helpful Tip: Take a photo of yourself from the side right now. Look at where your head sits compared to your shoulders. This is your starting point.
The damage goes deeper than you think. When you slouch, your spinal discs get compressed. Nerves get pinched. What starts as mild discomfort turns into chronic pain that follows you everywhere.
Helpful Tip: Set a timer for 30 minutes. When it goes off, stand up and stretch for 60 seconds. This simple habit can prevent hours of pain later.
Your phone makes things worse. You look down at your screen dozens of times per day. Each time, your neck bends forward. Doctors call this “text neck.” Your neck muscles weren’t designed to hold your head at that angle for hours.
The 1-Week Posture Transformation Timeline
Let’s be real: you won’t fix years of bad posture overnight. But you’ll see changes faster than you think.
Days 1-2: Your Body Wakes Up
The first two days feel strange. You’ll catch yourself checking your posture. Don’t obsess over it. Just notice when you’re slouching and correct it. Check once in a while, not every minute.

Your muscles might feel sore. This is normal. You’re using muscles that have been asleep for years. They need time to remember their job.
Helpful Tip: Soreness means progress, not injury. If something hurts sharp and sudden, stop. If it’s a dull ache in your upper back or shoulders, you’re on the right track.
Your body starts recognizing what correct alignment feels like. At first, sitting up straight feels awkward. By day two, it starts feeling less weird.
Days 3-5: Things Start Clicking
This is when you notice real changes. Your muscles are getting stronger. They’re learning to hold you upright without constant reminding.

Standing tall makes you feel different. More energy flows through your body. You walk into rooms with more confidence. People might even comment that something seems different about you.
Helpful Tip: Take another side photo on day 4. Compare it to your day-one photo. The changes might be small, but they’re real.
The tension in your neck and shoulders starts to ease. Not completely, but enough that you notice. Your head doesn’t feel as heavy. Your shoulders don’t creep up toward your ears as much.
Days 6-7: The New You Emerges
By the end of week one, you hold yourself differently. You catch yourself sitting up straight without thinking about it. Your body is starting to prefer this new position.

You’re less tired at the end of the day. Better posture means your body uses less energy to hold you up. You’re not fighting against yourself anymore.
Your breathing improves too. When you slouch, you compress your lungs. When you sit up straight, you can take full, deep breaths. More oxygen means more energy.
Helpful Tip: Notice how you feel at 4 PM on day seven compared to day one. That’s your progress marker.
Here’s what matters: change takes time. You won’t transform completely in seven days. But improvements happen fast when you practice consistently. This is your posture improvement timeline for quick results in your one week transformation.
The 12 Essential Exercises to Fix Your Posture in 1 Week
These posture exercises target every muscle that keeps you upright. Do them daily. They work.
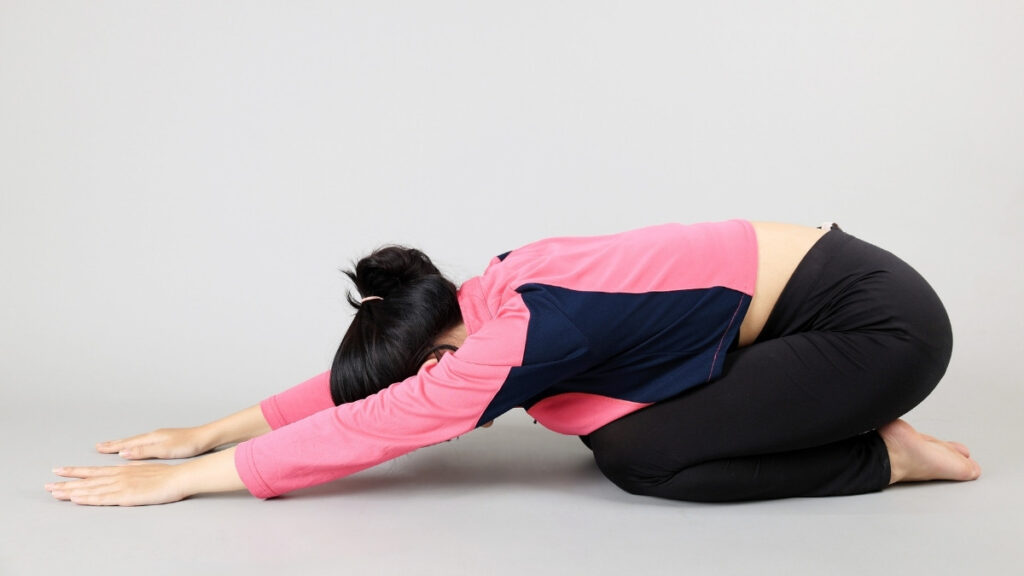
1. Child’s Pose – Your Ultimate Spine Relaxer
This move stretches your entire spine, glutes, and hamstrings. It releases tension trapped in your lower back and neck. Think of it as hitting the reset button for your body.
How to Do It:
- Sit on your shins with knees together and big toes touching
- Fold forward at your hips and walk your hands out in front of you
- Sink your hips back toward your feet (put a pillow under them if you can’t reach all the way)
- Rest your forehead on the floor or turn your head to one side
- Breathe deeply into your back and feel your ribs expand with each breath
Duration: Hold for 3-5 minutes, breathing deeply
Pro Tip: Don’t forget to breathe. Hold each stretch for 15-30 seconds and repeat 2-3 times throughout the day.
Helpful Tip: If your knees hurt, place a folded towel behind them. If your forehead doesn’t reach the floor, stack your fists and rest your head on them.
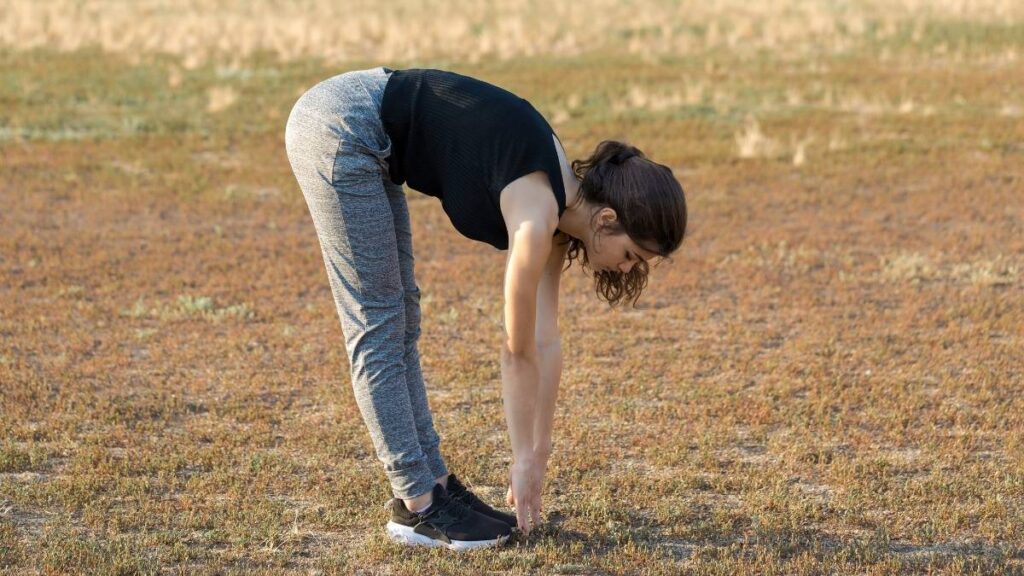
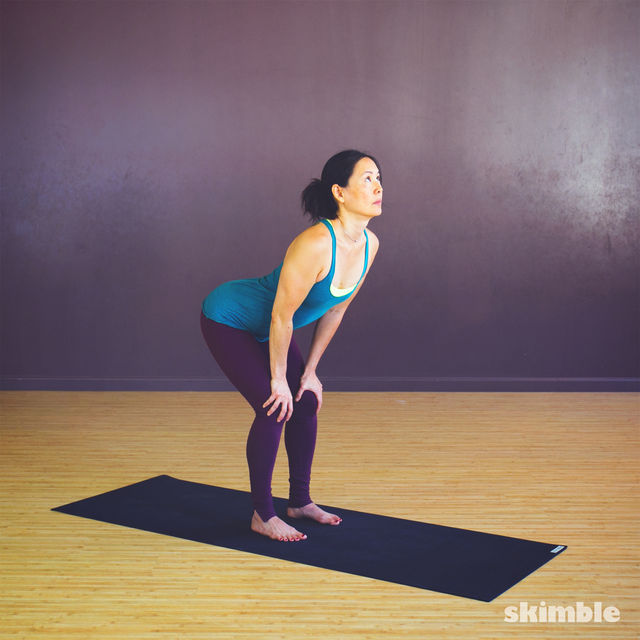
2. Forward Fold – Release Your Back Tension
This standing stretch melts away tension in your spine, glutes, and hamstrings. It’s perfect after hours of sitting. Your entire back gets a chance to decompress.
How to Do It:
- Stand with feet hip-width apart
- Bend forward at your hips and let your upper body hang like a rag doll
- Let your head and arms dangle toward the floor
- Bend your knees slightly if you feel strain in your hamstrings
- Feel the stretch along your entire back from your neck to your tailbone
Duration: Hold for 30-60 seconds, repeat 3-5 times
Pro Tip: Do this stretch every hour you spend sitting at your desk.
Helpful Tip: Don’t force yourself to touch the floor. Gravity will do the work. Just relax and breathe. Over time, you’ll get closer to the ground.
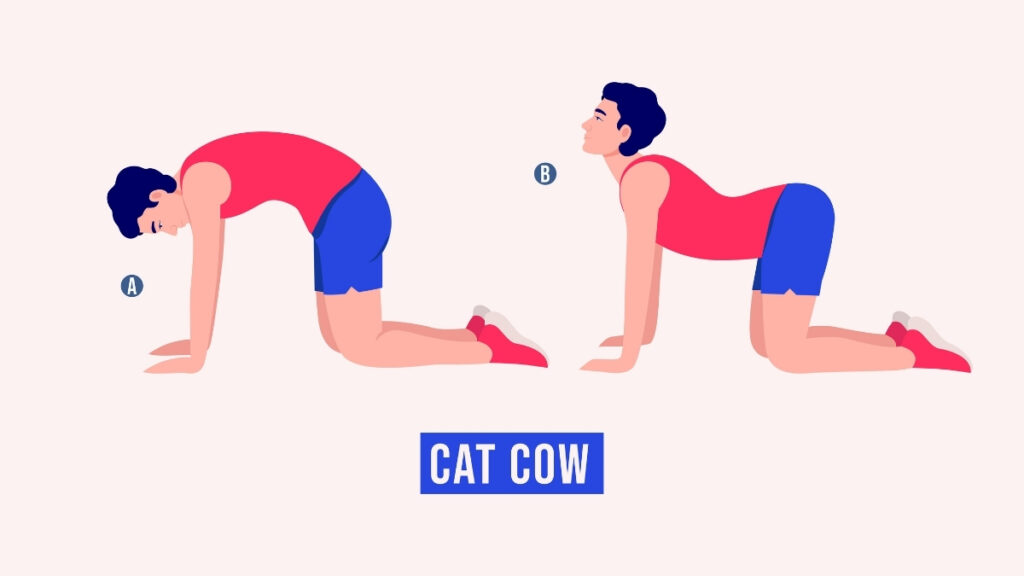
3. Cat-Cow – Mobilize Your Spine
This classic yoga move wakes up every single vertebra in your spine. It improves flexibility and melts away stiffness. Your spine moves the way it’s supposed to: with fluid motion.
How to Do It:
- Start on your hands and knees with wrists under shoulders and knees under hips
- Cat: Round your spine up toward the ceiling and tuck your chin to your chest
- Cow: Arch your back down, lift your chest and tailbone toward the sky, and look up
- Move slowly between these two positions
- Sync your movement with your breathing (exhale on cat, inhale on cow)
Duration: Continue for 2-3 minutes, completing 10-15 full cycles
Pro Tip: Do this first thing in the morning when your back feels stiff and creaky.
Helpful Tip: Move slowly. This isn’t a race. Each position should flow into the next like a wave moving through your spine.
4. Standing Cat-Cow – Office-Friendly Version
This variation loosens tightness in your back, hips, and glutes without getting on the floor. You can do this at your desk without anyone giving you weird looks.
How to Do It:
- Stand with feet hip-width apart and bend your knees slightly
- Place your hands on your thighs or extend them in front of you
- Arch your spine and look up (this is your cow position)
- Round your spine and tuck your chin to your chest (this is your cat position)
- Move between positions smoothly and controlled
Duration: Hold each position for 5 breaths, continue for 2-3 minutes
Pro Tip: Do this every single time you get up from your desk.
Helpful Tip: Keep your weight balanced over both feet. Don’t lean forward or back. The movement comes from your spine, not from shifting your body weight.
5. Chest Opener – Reverse the Desk Slouch
Opening and stretching your chest improves posture fast. Sitting all day makes your chest cave inward. This exercise pulls it back out and reminds your shoulders where they belong.
How to Do It:
- Stand with feet hip-width apart
- Bring both arms behind your back and interlace your fingers
- Press your palms together (or hold a towel between your hands if they don’t reach)
- Lift your chest toward the ceiling and bring your hands toward the floor
- Keep your head, neck, and spine in one straight line
Duration: Hold for 5 breaths, repeat 10 times
Pro Tip: This move stretches the exact muscles that tighten after prolonged sitting and improves mobility in your mid-back.
Helpful Tip: Don’t arch your lower back to get a bigger stretch. Keep your core engaged. The stretch should happen in your chest and shoulders, not your lower back.
6. High Plank – Build Your Posture Foundation
High planks develop balance and core strengthening in your core and back. These are the muscles that hold you upright all day. Strong core equals good posture. It’s that simple.
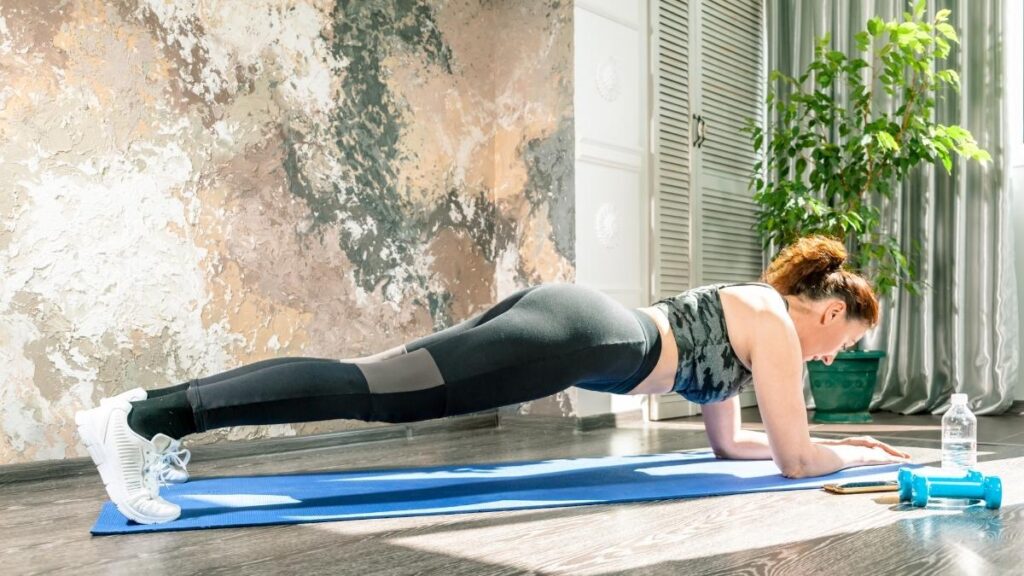
How to Do It:
- Start on all fours, then straighten your legs
- Lift your heels and raise your hips
- Create a straight line from the top of your head to your heels
- Engage your abdominal, arm, and leg muscles
- Keep your neck neutral and don’t let your hips sag toward the floor
Duration: Hold for 20-30 seconds, aim for 2-5 repetitions
Pro Tip: Gently squeeze your core muscles throughout the day to naturally straighten your posture.
Helpful Tip: If 20 seconds feels too hard, start with 10 seconds. If your wrists hurt, do the plank on your forearms instead. Build up gradually.
7. Side Plank – Strengthen Your Stability
This exercise targets the side muscles of your core that keep your spine stable. They prevent you from slouching sideways. Most people forget about these muscles, but they’re crucial for back pain relief.
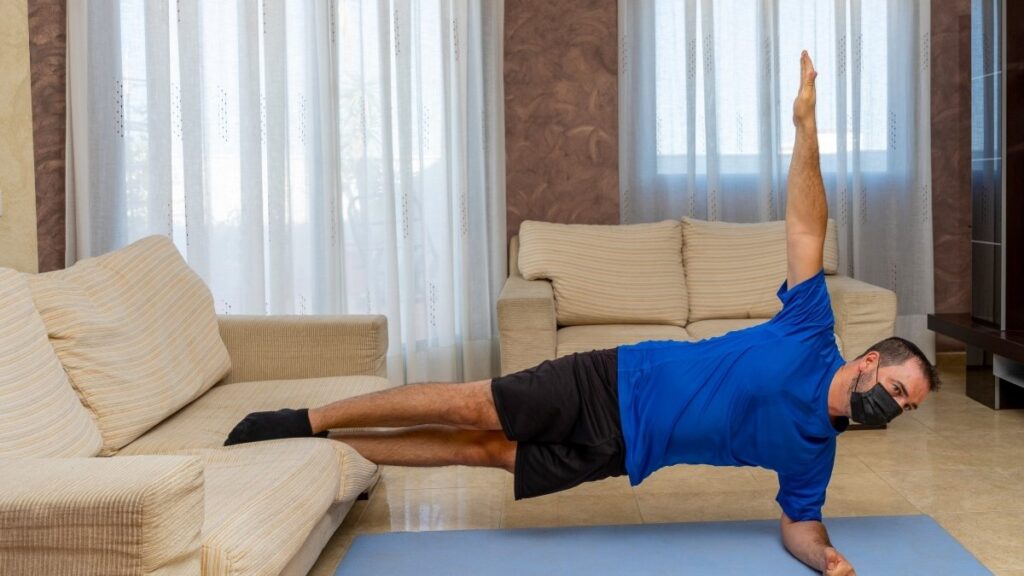
How to Do It:
- Lie on your side and prop yourself up on one forearm
- Stack your feet on top of each other or place your top foot in front for more stability
- Lift your hips off the ground and create a straight line from head to feet
- Hold your opposite arm toward the ceiling or rest it on your hip
- Keep your core tight and don’t let your hips drop
Duration: Hold 15-30 seconds each side, do 2-3 sets
Pro Tip: If this feels too challenging, bend your bottom knee and rest it on the floor for support.
Helpful Tip: Look straight ahead, not down. Keep your neck aligned with your spine. Your top shoulder should stack directly over your bottom shoulder.
8. Downward Dog – The Ultimate Posture Reset
This yoga staple stretches your entire back side from your heels to your shoulders. It builds upper body strength while lengthening tight muscles. It’s a complete posture fix in one move.
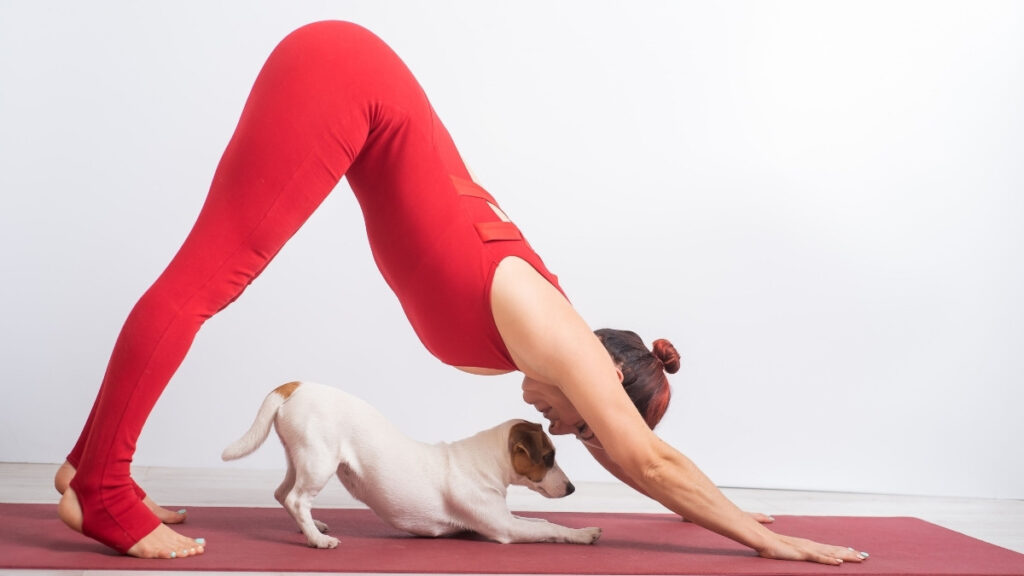
How to Do It:
- Start on your hands and knees
- Tuck your toes under and lift your hips toward the ceiling
- Press your heels toward the floor (they don’t need to touch)
- Push your chest back toward your thighs
- Keep your arms straight and position your ears between your arms
Duration: Hold for 5-10 breaths, repeat 3-5 times
Pro Tip: Bend your knees slightly if your hamstrings are tight. The stretch should feel good, not painful.
Helpful Tip: Press firmly through your hands and spread your fingers wide. This takes pressure off your wrists and engages your arm muscles properly.
9. Pigeon Pose – Release Hip Tension
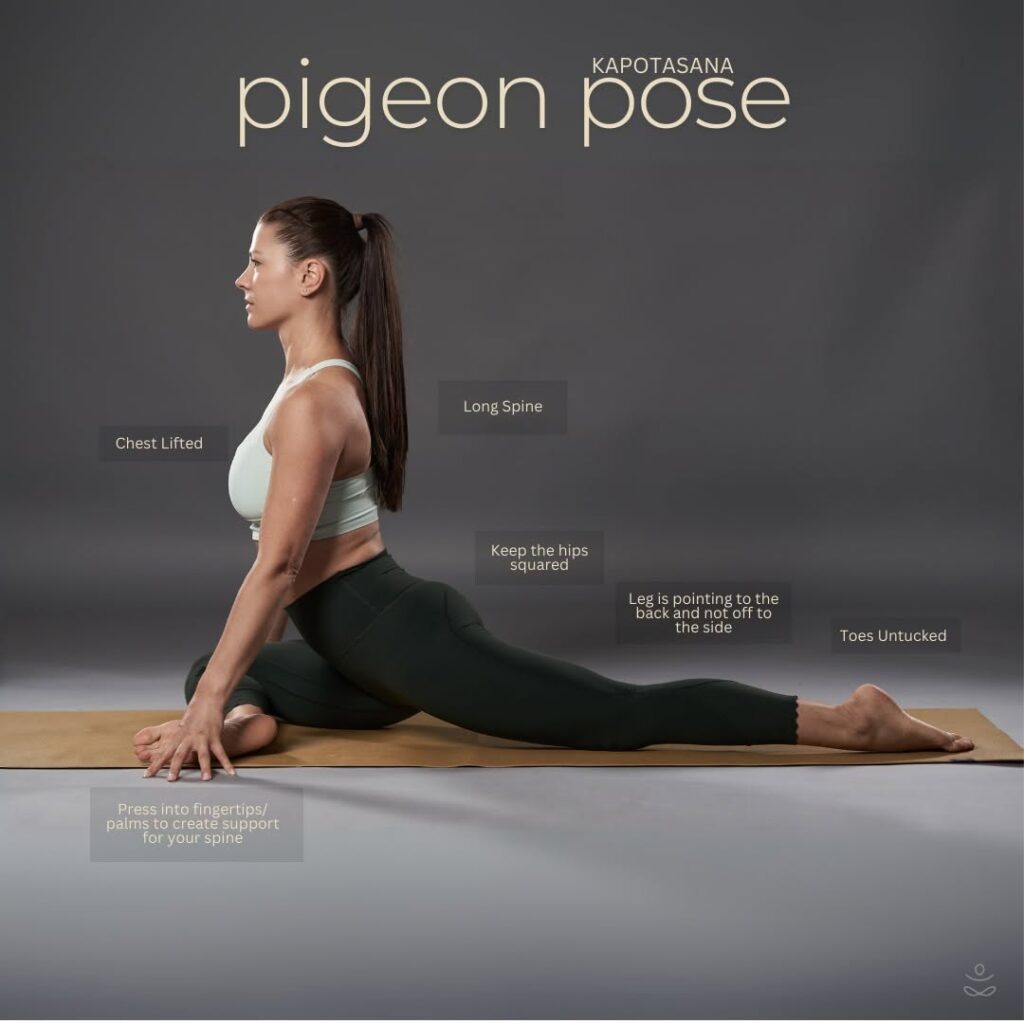
Tight hips pull your pelvis out of alignment. When your pelvis tilts, your spine has to compensate. This deep hip opener breaks that chain reaction and fixes the root cause of many back problems.
How to Do It:
- From your hands and knees, bring your right knee behind your right wrist
- Extend your left leg straight behind you
- Square your hips toward the floor
- Fold forward over your front leg if you’re comfortable
- Keep your hips level (use a cushion under your right hip if one side lifts up)
Duration: Hold 2-3 minutes each side
Pro Tip: Proper hip alignment is crucial. Bad hip posture contributes directly to low back pain.
Helpful Tip: This stretch is intense. Don’t force it. If your knee hurts, bring your front foot closer to your hip instead of stretching it away. The stretch should be in your hip, never in your knee.
10. Spine Rotation – Improve Your Twist
Desk work locks your spine in one position for hours. This exercise restores your ability to rotate and reduces mid-back stiffness. Your spine needs to twist to stay healthy.
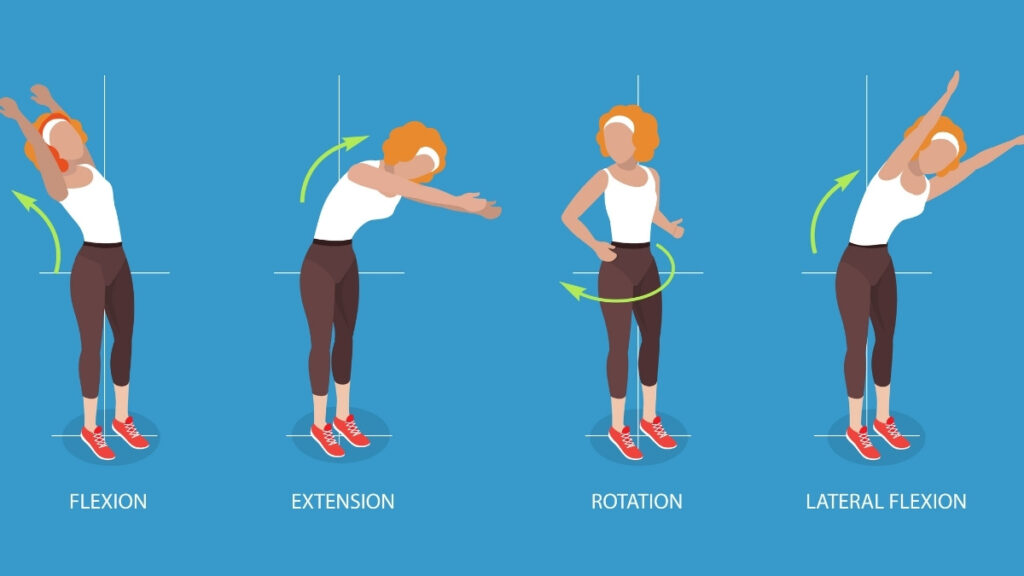
How to Do It:
- Sit in a chair with your feet flat on the floor
- Place your right hand on your left knee
- Place your left hand on the back of your chair
- Rotate your torso to the left and look over your left shoulder
- Keep your hips facing forward
- Breathe deeply into the stretch
Duration: Hold 15-30 seconds each side, repeat 3 times
Pro Tip: Do this exercise every 2 hours during your workday.
Helpful Tip: Don’t force the rotation. Let your breath help you twist deeper. Inhale to sit tall, exhale to rotate a little more. The twist comes from your mid-back, not from cranking your neck around.
11. Glute Bridge – Wake Up Your Posterior Chain
This move trains your core muscles to work together to stabilize your pelvis. Strong glutes are essential for upright posture. They keep your lower back from overworking and arching too much.
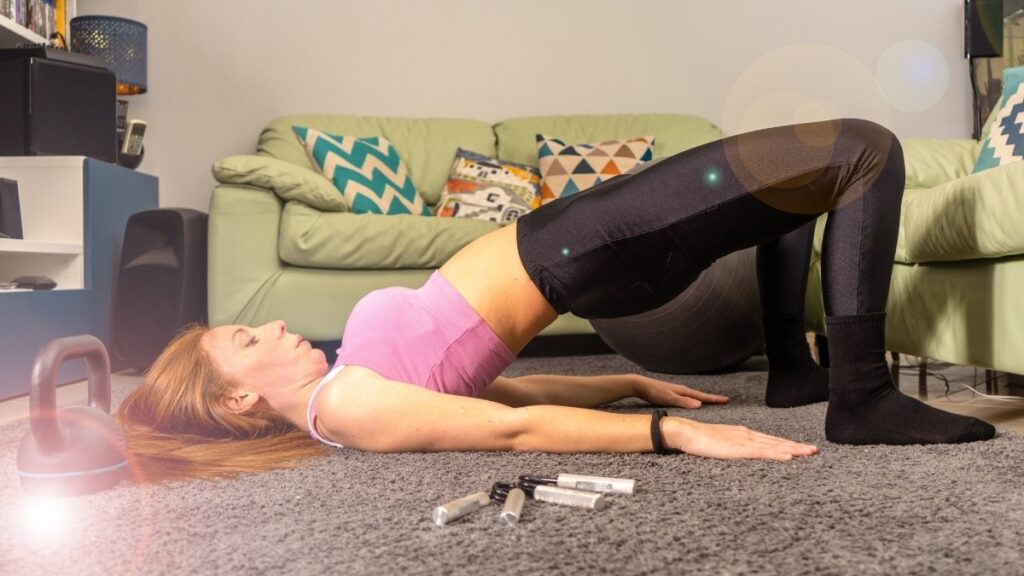
How to Do It:
- Lie on your back with knees bent and feet flat on the floor
- Place your arms by your sides with palms down
- Press through your heels and lift your hips toward the ceiling
- Squeeze your glutes hard at the top
- Create a straight line from your knees to your shoulders
Duration: Hold 3-5 seconds at the top, repeat 10-15 times
Pro Tip: Strong glutes prevent your lower back from overworking and arching excessively.
Helpful Tip: Don’t push up so high that your back arches. Stop when your body forms a straight line. Think about lifting your hips, not your chest. Keep your ribs down.
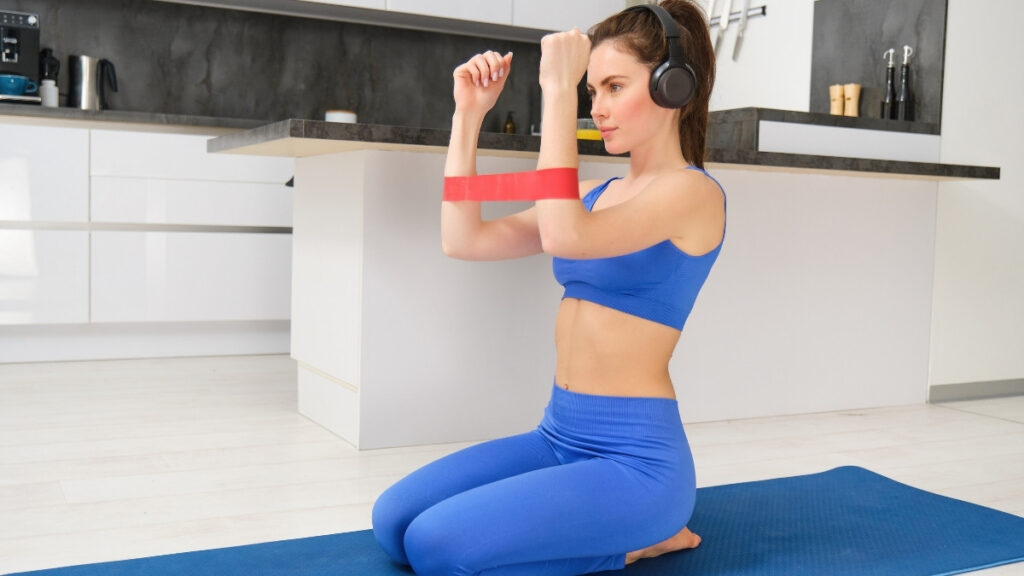
12. Isometric Pulls – Strengthen Your Upper Back
Strengthening your upper back keeps your shoulders from rolling forward. These muscles reduce back pressure and help you maintain good posture without thinking about it.
How to Do It:
- Stand with your arms extended forward at shoulder height
- Make fists and pull your elbows straight back
- Squeeze your shoulder blades together hard
- Hold that contraction and feel your muscles working
- Feel the muscles between your shoulder blades engage
Duration: Hold 30 seconds, repeat 5 times
Pro Tip: Shoulder strengtheners like this (squeezing your shoulder blades together for 30 seconds) are key to fixing poor posture.
Helpful Tip: Keep your shoulders down away from your ears. Don’t shrug them up. The movement is pulling back, not up. Imagine you’re trying to hold a pencil between your shoulder blades.
Your Daily 15-Minute Routine
You don’t need hours at the gym. Fifteen minutes a day will change your posture. Break it into three five-minute sessions that fit your schedule.
Morning Routine (5 minutes)
Start your day by waking up your spine:
- Child’s Pose (2 minutes) – This releases tension from sleeping
- Cat-Cow (2 minutes) – This mobilizes your spine before the day begins
- Standing Chest Opener (1 minute) – This opens your chest and sets your shoulders back
Do this right after you wake up. Before coffee. Before checking your phone. Your body is stiff from sleeping. These moves prepare you for the day ahead.
Helpful Tip: Keep a yoga mat next to your bed. When you see it first thing in the morning, you’ll remember to do your routine.
Midday Desk Breaks (5 minutes)
Your body gets locked up after hours of sitting. Break the pattern:
- Standing Cat-Cow (2 minutes) – This loosens your back without leaving your office
- Spine Rotation (2 minutes) – This releases mid-back tension from hunching over your keyboard
- Forward Fold (1 minute) – This decompresses your entire spine
Set an alarm for 1 PM or whenever you typically feel most stiff. This is your daily posture routine right when you need it most.
Helpful Tip: Close your office door or do these in an empty conference room if you feel self-conscious. Or own it. Your coworkers probably need these stretches too.
Evening Strengthening (5 minutes)
End your day by building the muscles that hold you upright:
- High Plank (1 minute total: hold for 20-30 seconds, rest, repeat)
- Glute Bridge (2 minutes: 15 reps, rest, 15 more reps)
- Isometric Pulls (2 minutes: 30-second holds with short breaks)
These exercises might feel hard at first. That’s because these muscles have been weak for years. Each day gets easier.
Helpful Tip: Do these while watching TV. Planks during commercial breaks. Bridges during the opening credits. You’ll barely notice you’re working out.
Weekly Progression for Your Exercise Schedule
Days 1-2: Focus on getting the form right, not on how long you hold each position. Learn what each exercise should feel like.
Days 3-4: Increase your hold times by 5-10 seconds. If you held a plank for 20 seconds before, try for 25-30 seconds now.
Days 5-7: Add a second set to all your strengthening moves. Two sets of planks. Two sets of bridges. Two sets of pulls.
This 15-minute workout builds on itself. Exercise programs for posture correction done three times per week for 8 weeks show major pain reduction. But you’ll notice changes in just the first week.
Helpful Tip: Track your progress. Write down how long you hold each exercise. Watching your numbers go up keeps you motivated.
Beyond the Exercises: Habits That Help
Exercises fix the damage. But daily habits prevent new damage. Both matter.
Set Up Your Workspace Right
Your desk setup either helps or hurts your posture. Most people get this wrong. Here’s what works:
Monitor at eye level. The top of your screen should be at or slightly below eye level. If you’re looking down, you’re training your neck to stay bent.
Keyboard at elbow height with wrists neutral. Your forearms should be parallel to the floor when you type. Your wrists shouldn’t bend up or down.
Use an ergonomic chair with lumbar support. Your lower back needs support. If your chair doesn’t have it built in, use a small pillow or rolled towel.
Helpful Tip: Measure your desk height right now. When you sit, your elbows should bend at 90 degrees when your hands are on the keyboard. If they don’t, adjust your chair height or use a keyboard tray.
Take active breaks and change your posture every 20-60 minutes. Your body wasn’t built to stay still. Movement reduces neck and low-back pain more than any other single habit.
Stand up. Walk to the water cooler. Shift positions in your chair. Small movements prevent big problems.
Helpful Tip: Use your bathroom breaks as movement breaks. Take the long route. Use the bathroom on a different floor. Add 100 extra steps to each trip.
The 20-20-20 Rule for Workplace Ergonomics
This simple rule prevents text neck and forward head posture. Every 20 minutes, look at something 20 feet away for 20 seconds.
Your eyes need breaks just like your body. Staring at a screen keeps your head pushed forward. Looking into the distance lets your neck relax into neutral position.
Helpful Tip: Set a repeating timer on your phone. When it goes off, look out a window or across your office. Count to 20 slowly. Then get back to work.
Strengthen Your Core Daily
Here’s a posture habit that costs zero time: activate your core muscles throughout the day. Gently squeeze your abdominal muscles while you sit, stand, or walk.
Not a hard squeeze that makes you hold your breath. Just a gentle engagement. Like you’re zipping up tight jeans.
This makes maintaining good posture effortless. Your core learns to stay active instead of switching off.
Helpful Tip: Practice this while sitting at red lights. Engage your core for the entire light. Release when it turns green. This builds the habit without adding time to your day.
Mind Your Phone Position
Here’s a scary fact: tilting your head forward just 30 degrees triples the stress on your neck. That’s what happens every time you look down at your phone.
The fix is simple. Look down with your eyes, not by bending your neck. Hold your phone higher. Bring it up to eye level instead of dropping your head down to phone level.
Helpful Tip: Notice where you hold your phone right now. Is it at chest level? Hip level? Raise it. Your neck will thank you by the end of the day.
Your posture habits matter as much as your stretching routine. Fix your desk setup today. Start the 20-20-20 rule tomorrow. Add core activation the day after. These small changes add up fast.
Start Your Transformation Today
Improving your posture in one week isn’t about being perfect. It’s about making progress. Good posture helps you avoid common aches and pains in your back, neck, and shoulders. It prevents sports injuries. It reduces wear on your joints as you age.
The 12 exercises in this guide target every muscle group that keeps you upright. Some stretch tight muscles. Some strengthen weak ones. Together, they fix the root cause of poor posture.
You have everything you need right here. No gym membership required. No special equipment. Just you, a floor, and 15 minutes a day.
Your Next Steps:
Start today with just the morning routine. Do Child’s Pose, Cat-Cow, and the Chest Opener tomorrow morning. That’s it. Three moves. Five minutes.
Set a phone reminder for your first exercise session. Schedule it for 7 AM or whenever you wake up. Treat it like a meeting you can’t miss.
Take a “before” photo of your posture from the side. Stand naturally. Don’t try to fix it. This photo is your baseline. Take another photo on day seven. You’ll be amazed at the difference.
Remember: with consistent practice, you can improve your posture. Your body will thank you. Your confidence will grow. That nagging back pain will finally ease. You just have to start.